Monday, April 9, 2018

More Brusho FUN!!

So one of my clubs had a renewal month - and each renewal we do a special project.  Brusho's had just been introduced, so I decided to do a four season sampler using the Brusho's as the background for each season.  Here is the final project - and the ladies had the choice of making it horizontal or vertical.  We used the SU shimmer cardstock for the base to get a little sparkle.
The WINTER panel used just the Prussian blue crystals - to get a blustery wintery background.  Snowflakes were cut of black and adhered - and the verse was from Colorful Seasons.
For the SPRING panel we used Prussian Blue in the upper portion and Yellow crystals in the lower - then popped up the branch and blossoms from the Seasonal Layers Thinlits to create cherry blossoms. 
SUMMER used the verse from the Beautiful You stamp set.  The background was Moss green (you can see some blue crystals in it) for the bottom, and yellow for the top - plus the Adirondack chair and a fun little glass of lemonade cut from the Seasonal Layers Thinlits.   We added some Wink of Stella to the lemonade.
Finally - our FALL panel used a mixture of the Gamboge, Moss Green and Yellow crystals for the back ground.  Then we cut leaves using the Seasonal Layers Thinlits and layered them over each other for a nice autumn look.
I was really happy with how they turned - and have this one hanging in my home - 
It's fun to do something other than cards - even though those are my fav.  Branch out - try something new - make something beautiful!  See you soon! ~Maureen

Click on any image below to go directly to my online store -

Friday, March 30, 2018

Having some fun with Brushos....

What an amazing and fun new product Stampin' Up! is carrying in their Occasions catalog!  Brushos - watercolor crystals!  LOVE THEM!  If ever a product was addicting - this is it!  In February we used Brushos in my Technique Clubs - below is a little chart I made about how they looked in different scenarios.  But really, what I found matters most - is the amount of water added.  If you want more of the crystals to show like the first example - then less water; want a more blended look like the last example - then more water. Both watercolor paper and Shimmer cardstock work wonderful - but you can use Brushos on the Whisper White and Very Vanilla - it just gets a little warped from the water.
Below is the card we made using the emboss resist technique with the Brushos.  We first embossed the large butterfly with clear embossing on watercolor paper.  Then sprinkled on the Brushos were we wanted them - and spritzed away with water till we got the look we desired.  After it all dried we just layered it on our card - being sure to use tear tape around all the edges of the watercolor paper to help it lay flat.  We even sprinkled a few crystals on the envelope and spritzed it.
Below is a card I made for my grandson, Zavian's birthday - on this card - I laid down the Brushos in stripes where I wanted it - blue across the bottom, yellow in the middle and red at the top - trying to mimic fire from the Fire Breathing Dragon :)  After completely dry and layered on my card - I added my colored images (I used Blends on these) and popped them up on dimensionals.  I really love how it turned out.
Stop back soon to see more of the fun we had at Club with Brushos!!! ~Maureen
Click on any image below to go directly to my online store - 

Tuesday, March 20, 2018

Quick and Clean Christmas Cards

I love these Christmas cards - so clean, and pure - with just a hint of sparkle.  We made these last November at my month Christmas cards class.  The back layer has the large snowflake embossed.
Then we used the Holiday DSP and some of the gold ribbon and a circle from our Champagne foil paper.  Since many of the products are not currently available - I will not have links at the end.
But they are just so pretty- I made up a ton of them for my own stash.  Hope you like them too and can glean some inspiration!
You can always order current products from my online store at www.stampingwithmaureen.stampinup.net  ~Maureen

Thursday, March 15, 2018

SF March No Rules Blog Hop

 
It's mid-March and time for another Stampin' Friends Blog Hop - and this one you do not want to miss out on - because we are giving away a BRAND NEW Stamparatus!  And this is my kind of hop - NO RULES!!!  So be sure to read through to the end - then hop on to all the other links commenting on each - each of those comments will get you an entry in the drawing - but be sure you add all your comments by 3/25/18 midnight (ET)!
So last week I did a fund-raising event for Ronald McDonald Charities - and we came together and made this amazing kit.  I just knew I had to feature it for the blog hop this month - as you get so much for your money - and....it's just plain beautiful.  Here is the box - all set to go - and you put labels on the dividers - then you can add all your birthdays to each month's divider card.
The kit makes four each of the cards shown below -
And I love them all.
You just have to assemble them - and you'll be all set to go -
Make this your year to never forget an important birthday!
Below is the kit contents - and the box can be used forever !!
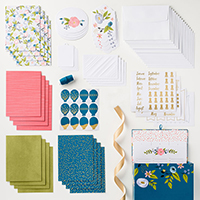
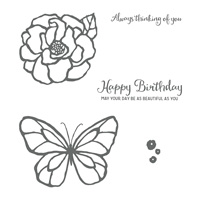
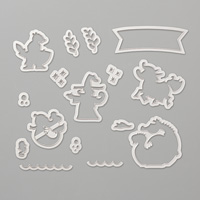
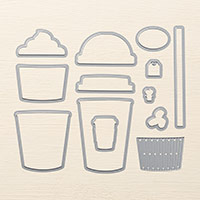
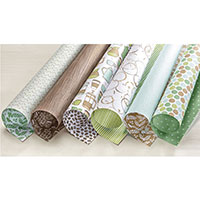
Perennial Birthday Project Kit - everything but adhesives included!*
Here are all the blogs on this hop - be sure to check each one out and COMMENT on each to get multiple entries for the Stamparatus giveaway!
1. Jenny Hall  
2. Kim Lamos  
3. Elizabeth Jeanne  
4. Katja Ettig  
5. Sue Vine  
6. Steph Jandrow  
7. Kathie Rotti  
8. Kirsteen Gill  
9. Melissa Thomas  
10. Raquelle Clifton-Batth  
11. Lori Mueller  
12. Andrea Tracy-Tucker  
13. Lynn Streifert  
14. Barbara Welch  
15. Cindy Waldroff  
16. Maureen Rauchfuss  
17. Sandra Mastello -Australia  
18. Sara Levin  

*For the month of March I am donating all my profits from the sales of this kit, the Perennial Birthday Stamp Set, and the Ronald McDonald House set from Stampin' Up! - Sharing Sweet Thoughts.  All profits will be sent to RMHC the first week in April.  For this donation you must order through me at www.stampingwithmaureen.stampinup.net-
Perennial Birthday Project Kit Sharing Sweet Thoughts Wood-Mount Stamp Set Perennial Birthday Clear-Mount Stamp Set 

Thursday, March 8, 2018

Thanks a Latte....

You all know me and Coffee!!! Or if you don't you haven't been checking my blog often enough.  I am addicted!!!  I love anything and everything coffee related - but most of all I just LOVE drinking it.  So I saw this adorable tutorial on Sarah-Jane Rae's cardsandacuppa blog, on how to make a little treat bag using our Coffee Cafe set and framelits - and I had to try it.  Here is a link to the post - COFFEE TREAT BAG  Her instructions are great, but measurements were metric - so I'll give you my measurements for my treat holder, later in this post.
So here is the finished treat holder - front and back.
And inside I wrapped Hershey nuggets - put them in a cello bag and tied with a coordinating ribbon.
We made these at a recent club meeting -
and then I made a bunch more for treat at an upcoming BUNCO event I'm doing.
I did the large cup - so here are my measurements and tips - 
Large Cup: 
Cut 2 cups from 2 1/4"x3" piece of Espresso cardstock
Cut 2 lids from 1 x 2 3/8" piece of White cardstock
Cut 2 sleeves from 11/2x2" piece of DSP of your choice
Stamp and cut 1 oval with verse from a 1 x 1 1/4" piece of white cardstock (for front of treat holder)
My measurements to make the bottom and sides of cup - a piece of Espresso cardstock 5 1/2" by 3".  Score long side at 2 1/4" and at 3 1/4".  Score short side at 1/4" and at 2 3/4".
Then follow her video to complete.  She left  her bottoms on the cups rounded, but I wanted mine to sit flat, so I trimmed the extra rounded part off the bottom on each side -and it worked great.  Hope you enjoyed!  ~Maureen
You can go to my online store here  or click on any image below to go right to that product in the store.