I am so in love with the richness of this new Eastern Palace Suite of products from Stampin' Up! Today I wanted to share this elegant card - simple notecard - or maybe a masculine birthday card.
Here's another picture without the glare from my flash.
You can find this suite of products on page 18 and 19 of the new catalog. Click on the next two pages below to go to an online version of our catalog.
Below is another angle - you can hopefully see here that the white layer is popped up on dimensionals, and the golden floral image is actually a sticker. How cool is that.
Let me know what you think - I love to read your comments. See you soon!!! ~Maureen
So for the last year I've been sharing the composition notebooks and RSVP pens I was giving my club hostesses. I really love doing those - and they are a great seller at craft fairs. But now we are into a new round of clubs, and I wanted to share what I am making my hostesses this year. It is one of our stamp cases - decorated -
and filled with a little pocket for notes, receipts or business cards; a pen, and a post it note tablet. I just LOVE these. This is the first one I gave and I'll be sharing a few more in the future.
I've made these for many gifts and craft fairs over the years - and they are terrific - as you can carry them in your purse or tote and your papers won't get lost or ruined. Perfect organizational tool! And the Beautiful You set and sentiments are also perfect. It's a great way to use up some of that beautiful retired DSP. Hope you like it too! ~Maureen
I am so excited to share these cards - as I am so in love with this new Stampin' Up! set "Crafting Forever". First here are the TEAM cards I made to send out to some of my top achievers. Are the just adorable?!
I watercolored the pots of brushes on white shimmer paper using archival black for stamping and an aqua painter and ink directly from the pads for the painting.
Here you can see that these pots were cut out and popped up on the white layer to give the card some dimension.
Below - getting ready to go in the mail.
I did a similar thing for my recent Open House.
This is what was given out to the first 10 people that RSVP'd. So cute!
Hope you all check out this set. If you want to order, or would like more information about this product or Stampin' Up! in general - please email me at crazystampinglady@gmail.com
~Maureen
Click on any image below to go directly to my Stampin' Up! online store -
So here's the second card we made at Advanced Cards last month. - it is a double Z card and a little less labor intensive than the last card. I used the Guy Greetings set - which I really love.
Above it is folded closed for mailing, but below you can see it standing up open.
Each lady was given a piece of Very Vanilla cardstock that they can write on and adhere to the third over brown panel. Otherwise - if they adhered it first - it would be impossible to write on.
They were also given a choice of "Happy Birthday" or "Happy Father's Day" to use as their sentiment. This is a fun, relatively easy card to make - that packs a punch!
The group really seemed to like it, and now I have some masculine cards on hand. Loving that! See you all soon. ~Maureen
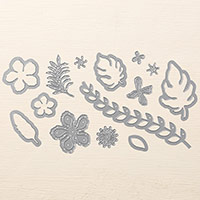
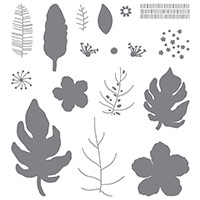
Sharing one of the two cards we made last month at my Coffee and Advanced Cards class. I focused on using one of my very favorite retiring sets and framelits - Botanical Blooms and Botanical Builder Framelit Dies. Really I am so sad that these are now gone - I have made so many beautiful cards - just can't seem to go wrong with these. So this first card is a gatefold card with a belly band. We used VersaMark ink on the background to leave that great watermark.
Then also continued it down the center under the sentiment. You can see here how the card opened. You just slide the belly band off and it opens in the center.
Here is a bit more of a side view. We layered the flowers and leaves so they were all attached only to the belly band and also slide right off with it. Added a few pearls or gems (their choice) for a finishing touch. The card was scored to fold and become a 5.5" x 4 1/8" - slightly narrower than our norm. This allows it to fit a regular envelope without being crunched.
Finally - here is the finished card and envelope - crying just a few tears here as this set goes. But I'm not ready to part with the set or framelits just yet. So you may see a few more creations :)
See you all soon ~Maureen