Okay - I really hope you guys don't get sick of me and butterflies - but they make me so very happy - and what speaks to SUMMER more than butterflies. I have about 100 of these beauties from the Butterfly Gala set stamped up, and I color them when I need a break from life. And with a Summer Blog Hop theme - how could I resist using these amazing creatures again.
My favorite medium for coloring them is of course our Blends - just can't go wrong with them. Any color or combo of colors seems to turn out beautiful.
Here are a few I did recently - don't they look like they just want to take off and fly?
For my cards today, I also used up a bunch of scraps. I keep all those little half inch strips when we prep for our card layers - and then I use them to edge layers on new cards.
These bright colors are the perfect contrast with the black and white gingham.
So I add the strips - which mimic the look of a layer, without the weight or waste - pop on a couple butterflies with glue dots so their wings can still rise, and a sentiment. Plus decorate the envelope of course - and DONE!
Here are a couple other samples, in other colors -
What a pretty trio of cards - what are you coloring today to brighten your mindset? Why not a few butterflies :)
But - if coloring is not your thing - you can still have FUN with butterflies. Just look at these adorable little treat holders.
Gingham again from our retired Occasions catalog - but this time the butterflies are just stamped with black onto a coordinating color and punched out. So no coloring!
This is made with an adaptation of the measurements on a 2-4-6-8 box. I started with a 5 1/2" x 6" piece of gingham paper, scored it the short way at 1 1/2", 2 1/2", 4" and 5" then scored horizontally across the bottom at 1". So after folding and adhering it, it left a box 5" tall with front and back dimensions 1 1/2" and side dimensions 1". I then punched a little indentation on each side with my 1/2" circle punch and ties a cute bow around before adding my sentiment and coordinating butterfly. I just love how they turned out.
Here is a rough template for these - I always sketch out so I can remember how I made boxes. It is easy to adjust to any size you need - Just be sure your 1st and 3rd panels are equal size; and your 2nd and 4th panels are equal size; and your bottom score is the same as your smallest panel (not including the flap).
Once again I hope you enjoyed these projects and got some inspiration for creating something wonderful. I would love it, if you would leave me a comment below. Don't forget to click through on each name below to see even more amazing Posts with a Summer theme. See you soon with more ideas! ~Maureen
JUNE SF Hoppers - check them all out for some great ideas - and please leave comments if you can to show appreciation for their work :)
To order any of Stampin' Up's products you can go directly to my online store -www.stampingwithmaureen.stampinup.net and click on SHOP NOW. Please use the Hostess Code below to get full benefits from me. Thank you!
So I have loved this technique for years - but I forget about it. Recently I had a club member ask about Bokeh and so I decided to play with it for our May Technique clubs. Our finished product was this card below - using the now retired Dragon Dreams dies.
The technique is really pretty simple - you start with a base of color - in this case we used daubers to add a series of colors to a piece of WW cardstock till it was virtually covered with color.
Next I used a vellum template I made by cutting out circles using our layering circle dies in different sizes. Using our craft white ink and working largest to smallest circle - we added circles of white right over the colors. You can see in the picture below how the circles overlap and layer to give that Bokeh look and depth.
Here is another view where you can see the circles. Now this is craft ink, so you need to let it dry completely. I like air-drying better than the heat tool, as I think heating it mutes the circles more- but if you are in a time pinch - go ahead and heat it.
Then when you are done, you can stamp on it, or layer over it like we did in the first picture.
However you decide to finish it, I am sure it will be beautiful. So go ahead, give this one a try! ~Maureen
To order directly from me online, just click on any product image below and it will take you to my online store - be sure to use my hostess code below before check out to get full benefits from your shopping. Note: if your order is over $150 pre Shipping and Handling and tax - do not use the code - as you will get some free merchandise directly from Stampin' Up! for an order that size.
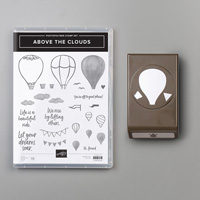
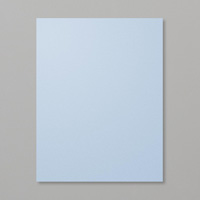
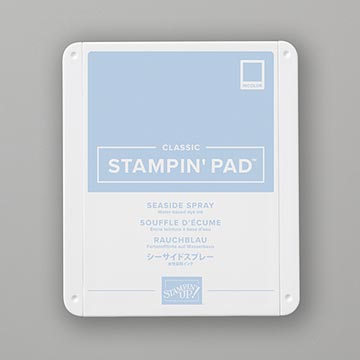
Today I'm sharing one of the card designs I did for a recent New Catalog Swap I participated in (thanks Barbara W. for hosting). I loved this set as soon as I saw it - and knew I had to get it; especially thinking it would make a great graduation card with this sentiment. So for this card - the square of blue was made by stamping my "D" acrylic block directly onto my Seaside Spray (one of our new in-colors) pad - then spritzing it with a little water, and pressing it down on my card base. You can see each one turned out a little differently.

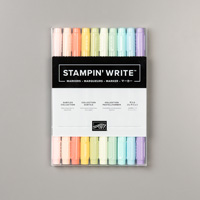
After that was done and dry - I stamped the little balloons right onto the card base overlapping that blue sky; and colored them with our markers. I stamped the large balloon and basket onto a scrap of Whisper White cardstock, colored and punched out with our new Hot Air Balloon punch. You can find this bundle on page 89 of our new 2019 Annual Catalog. Then I added the sentiment and popped up the large balloon on dimensionals - added a little bling in the air and I was done.
If you don't have our new catalog and would like one - just drop me an email at crazystampinglady@gmail.com. They are free for porch pick-up; or $7 for mailing, but you will get a $7 off coupon for your first purchase - so it will end up being free. This catalog is amazing and filled with lots of creative inspiration! I'd love to be your Stampin' Up! demonstrator and creative coach.
To order directly from me online, just click on any product image below and it will take you to my online store - be sure to use my hostess code below before check out to get full benefits from your shopping. Note: if your order is over $150 pre Shipping and Handling and tax - do not use the code - as you will get some free merchandise directly from Stampin' Up! for an order that size. ~Maureen