
Showing posts with label Cheerful Daisies. Show all posts

Sunday, June 18, 2023

Share it Sunday! Free tutorial - Cheerful Daisies


It's Sunday - and time to share another great card and free tutorial! Today's card is made with my JUNE bundle bonus -  these daisies just make me smile - see my bonus offer on this bundle at the end of the post.  Hope you like it!  Enjoy!  

#161297 Cheerful Daisies Bundle $53.00
~*~*~*~*~

Click HERE to find and print your tutorial sheet.

Cheerful Daisies

All images © 1990-2023 Stampin’ Up! ®


Supplies:

 ·       Stamp Sets: Cheerful Daisies (161290)

·       Card Stock: Basic White (159276); Wild Wheat (161725), Moody Mauve (161723); Fresh as a Daisy Designer Series Paper (161289)

·       Stamp Pads: Wild Wheat (161651)

·       Tools: Cheerful Daisies Dies (161296)

·       Miscellaneous: Paper Trimmer (152392); Paper Snips Scissors (103579); Stampin’ Dimensionals (104430); Stampin’ Seal (152813); Stampin’ Cut & Emboss Machine (149653); Stampin’ Mini Dimensionals (144108); Adhesive Paper (152334)


Measurements:

·       Wild Wheat: 4 ¼” x 11, 4 ¼” x 2 ¾”

·       Basic White: 3 ¾” x 5”; Scrap

·       Moody Mauve: 4” x 2 ½” (2); 4” x 5 ¼”

Instructions:

1.    Cut a piece of Wild Wheat Card Stock 4 ¼” x 11 and score at 5 ½” to make the card base. Cut off half of one of the side at 2 ¾”.

2.    Cut a piece of Mood Mauve card stock 4” x 5 ¼” and adhere inside of card base.

3.    Cut two pieces of Moody Mauve at 4” x 2 ½” and adhere one to left side of card base as shown and separate piece of card base you cut off in Step 1.

4.    Cut two pieces of Fresh as a Daisy Designer Series Paper at 3 ¾” x 2 ¼” and adhere to left side of card base and separate piece you cut off in Step 1.

5.    Die cut large three flower die out of Wild Wheat card stock.

6.    Die cut the separate three backing pieces of the daisies out of Basic White.

7.    Die cut the fill in pieces of the daisies out of Moody Mauve backed in adhesive paper.

8.    Adhere the pieces you die cut in steps 5-7 together as shown.

9.    Stamp leaves in Wild White and die cut out and adhere to large daisy you created in Step 8.

10. Adhere separate piece you cut off the card base and created in Steps 1, 2 and 4 to the front of the card base perpendicularly as shown.

11. Adhere large three daisy piece you created above to front of card as shown popped up with dimensionals.

12. Stamp sentiment in Wild White and fussy cut out and adhere to front of card popped up with Mini dimensionals.

13. Cut a piece of Basic White 3 ¾” x 5” and adhere to inside of card base.
~*~*~*~*~

You can check in the SHOP NOW tab at the top of this page to find my current hostess code at any time.

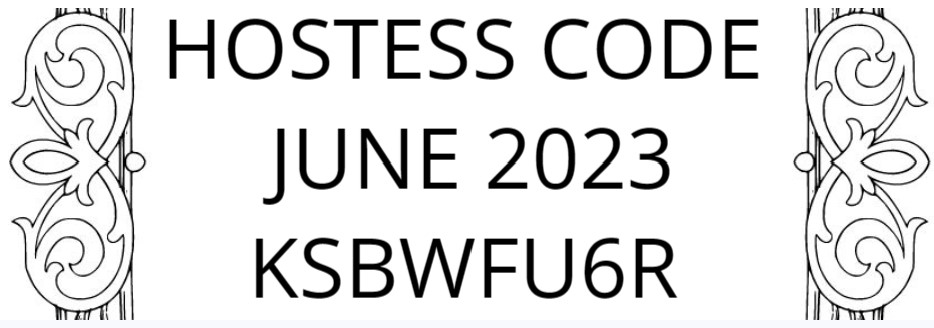
To order any of Stampin' Up's products you can go directly to my online store - www.stampingwithmaureen.stampinup.net  and click on SHOP NOW.  Please use the Hostess Code KSBWFU6R through June 30, 2023 to get full benefits from me-


*NOTE: If your personal order is not part of a current party and you are ordering over $150 in merchandise - please do not use this code; as your order without the code will qualify you to earn a minimum of 10% in hostess benefits.  

~*~*~*~*~

Fresh as a Daisy Bundle Bonus for June 2023

#161297 $53.00*

*Product available at time of offering.

Cost shown is in the U.S. Market for June 2023 – Price will

vary in other Stampin’ Up! markets.

 Order the above bundle in the month of June, and all of my profits from the sale will go to support Doors of Hope ministry in Murfreesboro, TN – see more about this incredible ministry here –

Doors of Hope | (opendoorsofhope.org)

Plus - you will receive a special full bundle tutorial of additional card ideas, created by myself this month – that you can use to create wonderful projects.  Tutorial bundle will be sent out as soon as possible – usually the Sunday after your purchase.

~*~*~*~*~

If you don't currently have a demonstrator, and would like a catalog or would like to learn more about Stampin' Up! and our products, please email me at crazystampinglady@gmail.com

*Note: Product pricing varies by market.  Check with your local demonstrator if you are not in the U.S. to find out your cost.  Product active to purchase at the time of this post.
_________________________________________

Always Stamping, Maureen - the Crazy Stamping Lady!


Sunday, May 7, 2023

Share it Sunday! Free tutorial - Cheerful Daisies!


It's Sunday - and time to share another great card and free tutorial! Today I'm sharing a fun and simple card using the Cheerful Daisies set that is brand new in our catalog. What a great set this is.  I used it this week on a FB Live to do a different card you can see here - www.facebook.com/CrazyStampingLady/videos/617836603578106

Hope you like it!  Enjoy!

#161297 Cheerful Daisies Bundle $53.00*

~*~*~*~*~
Click HERE to find and print your tutorial sheet.

Cheerful Daisies

All images © 1990-2023 Stampin’ Up!®

Supplies:

·       Stamp Sets: Cheerful Daisies (161290) or discounted as a bundle (161297)

·       Card Stock and Paper: Copper Clay (161721), Boho Blue (161724), Vellum (101856), Basic White (159276), Fresh as a Daisy 12” x 12” Designer Series Paper “DSP” (161289)

·       Stamp Pads: Copper Clay (161647), Boho Blue (161650)

·       Tools: Stampin’ Cut & Emboss Machine (149653); Bone Folder (102300); Paper Snips (103579)

·       Miscellaneous: Cheerful Daisies Dies (161296) or discounted as a bundle (161297); Stylish Shapes Dies (159183), Linen Thread (104199), 2023-2025 In Color Dots (161620); Multipurpose Liquid Glue or “glue” (110755); Stampin’ Dimensionals (104430), Mini Glue Dots (103683), household tape

 Measurements:

·       Copper Clay card base: 5-1/2” x 8-1/2”, scored at 4-1/4” and burnished with the Bone Folder; scraps

·       Boho Blue: 4” x 5-1/4”, 3” x 3”

·       Designer Series Paper: 3-3/4” x 5”

·       Basic White: 1-1/2” x 3”, scraps

·       Thread: 24”

 Instructions:

1.    Adhere DSP to Boho Blue and then that piece to card base with Multipurpose Liquid Glue.

2.    Die cut two leaves out of Basic White and two branch sprays in Copper Clay.

3.    Die cut circle from Vellum.

4.    With Boho Blue ink, stamp daisy outline onto Boho Blue cardstock. With same ink, stamp off once with the inside of the flower aligning inside the previously stamped outline. Die cut daisy.

5.    Stamp center of daisy with Copper Clay ink onto same color cardstock.

6.    Stamp sentiment with Copper Clay onto Basic White and die cut.

7.    With dots of glue affix branches and leaves behind daisy. Secure with tape. Glue that piece to vellum circle then glue sentiment onto lower right of daisy.

8.    With Stampin’ Dimensionals behind vellum and sentiment, affix to card front.

9.    Double thread and tie a bow, trim ends with Paper Snips, and affix to front with Mini Glue Dot.

10. Sprinkle three Boho Blue Dots on card front.

~*~*~*~*~

You can check in the SHOP NOW tab at the top of this page to find my current hostess code at any time.

To order any of Stampin' Up's products you can go directly to my online store - www.stampingwithmaureen.stampinup.net  and click on SHOP NOW.  Please use the Hostess Code TQ4BBRCY through May 31, 2023 to get full benefits from me-
*NOTE: If your personal order is not part of a current party and you are ordering over $150 in merchandise - please do not use this code; as your order without the code will qualify you to earn a minimum of 10% in hostess benefits.   
~*~*~*~*~
MAY BUNDLE BONUS!


Proceeds from every purchase of this bundle during the month of May 2023 go to support the
  Doors of Hope Ministry in Murfreesboro, TN 
Plus, you will receive a Bonus Tutorial PDF (sent within a week following your order) featuring great projects and ideas with this bundle. You must order using the hostess code above to get these benefits!

~*~*~*~*~

If you don't currently have a demonstrator, and would like a catalog or would like to learn more about Stampin' Up! and our products, please email me at crazystampinglady@gmail.com

*Note: Product pricing varies by market.  Check with your local demonstrator if you are not in the U.S. to find out your cost.  Product active to purchase at the time of this post.
_________________________________________

Always Stamping, Maureen - the Crazy Stamping Lady!