Showing posts with label Class. Show all posts

Friday, December 15, 2023

They're Back!!! Monthly in-person and Online class options!!

 UPCOMING STAMPING CLASS Options

With the CRAZY STAMPING LADY

January 2024

Crazy Stamping Lady’s Coffee and In-Person cardmaking class option!!

This month we are doing project using the new “Bee Mine” suite of products

Shelli’s Coffee – 352 W Northfield Blvd., Suite 4b, Murfreesboro, TN 37129

Phone: (615)624-6742

 Friday, January 26, 2024

1:00 – 3:00 PM

Cost: $20 to make four beautiful, handcrafted cards and envelopes, two each of two designs and a bonus 3D project; using the Bee Mine suite of products from the new January - April Mini Catalog.

Or get this class FREE with a $50 merchandise order (pre-S&H and tax) at the event.  (Plus, since this class is during Stampin’ Up!’s Sale-a-bration you will earn a free product with that $50 purchase).

Price includes all materials prepped and ready to complete your projects, as well as instruction from me.  Plus, a  door prize drawing for those present, one entry per person.  No additional purchase necessary.

*~*Please bring your own tape runner or double-sided tape - all other adhesives will be provided.  If you do not have adhesives will be available for sale at the class.~*~

  Limit 6.  Must email me at crazystampinglady@gmail.com to RSVP and hold your spot, I will always confirm your place in the class by email or Facebook messenger. 

Class must be ½ full to avoid cancellation – so grab a friend (or 2 or 3) and come make something wonderful!

 ~*~*~*~*~

 This class will also be offered as an ONLINE option –

Online class will be in a PRIVATE Facebook group that you will be invited to join once signed up;

Saturday, January 27, 2024

10:00 AM – Noon (CT)

Cost: $25 includes S&H for kit (payable through Venmo) to make four beautiful, handcrafted cards and envelopes, two each of two designs and a bonus 3D project; using the Bee Mine suite of products from the new January - April Mini Catalog.

Or get this class fee of $20 FREE with a $50 merchandise order (pre-S&H and tax) placed within 24 hours of the class.  Note: since you will be pre-paying through Venmo – your class fee will be reimbursed to you through Venmo after your order is placed.  (Plus, since this class is during Stampin’ Up!’s Sale-a-bration you will earn a free product with that $50 purchase).

Price includes all materials prepped and ready to complete your projects, as well as instruction from me.   You will need to provide your own adhesives and per Stampin’ Up! rules, no stamping can be done for you, so you will need to add your own ink and stamps to complete your projects.  Since I am using the Bee My Valentine set – you could consider buying it ahead of class to have those sentiments available – but not required.  Plus, a  door prize drawing for those who attend the live class online, one entry per person.

No additional purchase necessary.

   Limit 10.  Must email me at crazystampinglady@gmail.com to RSVP and hold your spot, I will always confirm your place in the class by email or Facebook messenger.  Please wait for confirmation to pay.  Deadline to sign up for the online class is Monday, January 15, so I can get your kits out to you on the 16th – so hopefully you will have them by class time.

 If for some reason your kit does not arrive on time you will be able to access the video after, to put the kit together. 

Friday, September 10, 2021

August Paper Pumpkin - Alternative Project #2

So my Paper Pumpkin class for the August kit is over and I can continue to share what we did as our alternatives - here is the second project - 


Tips
To duplicate you would use the card base from the kit that is Melon Mambo and speckled; the rectangle layer that is Bermuda Bay and speckled; the large butterfly cut in half; small purple butterfly and the long strip of the sentiment shown cut apart as shown..  I used discontinued embellishments - but you could use plain gems or pearls as is or colored with one of our Blends.  

No stamping on the outside of this one.  Just place and adhere the elements as shown and add your gems.  The sentiment pieces were put onto dimensionals and the small butterfly adhered with a glue dot.  That was it - finish inside as you like and pick the envelope from the kit you want to go with it.
Let me know if you have any questions and stop back soon to see the rest of my alternative projects for this kit.  ~Maureen

~*~*~*~*~
To order any of Stampin' Up's products you can go directly to my online store -www.stampingwithmaureen.stampinup.net and click on SHOP NOW.  Please use the Hostess Code below to get full benefits from me - SDUHMDAT*

*NOTE: If your personal order is not part of a current party and you are ordering over $150 in merchandise - please do not use this code; as your order without the code will qualify you to earn a minimum of 10% in hostess benefits.   

 ~*~*~*~*~

If you don't currently have a demonstrator, and would like a catalog or to learn more about Stampin' Up! and our products, please email me at crazystampinglady@gmail.com
Stop back soon for some more creative fun and inspiration.     ~Maureen

Thursday, September 9, 2021

August Paper Pumpkin - Alternative Project #1

So my Paper Pumpkin class for the August kit is over and I can now share what we did as our alternatives - here is the first project - 

Tips
To duplicate you would use the card base from the kit that has the swirls and spots on it; the yellow tag from the kit; the swirly flowers that are on the same sheet as the large butterfly and your stamps, ink pad and  sequins.  

We just stamped the butterflies as shown.  Added the swirly flowers with just a little Tombow glue on the back.  Laid the tag on the card at an angle and then stamped the sentiment so it went straight with the card.  After stamping - we stapled a 3" piece of ribbon (your choice) folded in half to the top and popped the tag up on dimensionals.  That was it - finish inside as you like and pick the envelope from the kit you want to go with it.
Let me know if you have any questions and stop back soon to see the rest of my alternative projects for this kit.  ~Maureen

~*~*~*~*~
To order any of Stampin' Up's products you can go directly to my online store -www.stampingwithmaureen.stampinup.net and click on SHOP NOW.  Please use the Hostess Code below to get full benefits from me - SDUHMDAT*

*NOTE: If your personal order is not part of a current party and you are ordering over $150 in merchandise - please do not use this code; as your order without the code will qualify you to earn a minimum of 10% in hostess benefits.   

 ~*~*~*~*~

If you don't currently have a demonstrator, and would like a catalog or to learn more about Stampin' Up! and our products, please email me at crazystampinglady@gmail.com
Stop back soon for some more creative fun and inspiration.     ~Maureen

Tuesday, November 10, 2020

Shadow Box to Note Cards - think outside the box !

So on my Facebook Live today I shared a quick tip on how to use components from large projects to make some adorable little note cards.  You can view the video - HERE!

I started with this beautiful Shadow Box FALL sampler that we made at a recent class - It uses all current products from the Annual Catalog and the Fall Mini Catalog.

After the class I ended up with a ton of extra pieces that I had cut just in case - so instead of just sticking them in a box - I decided to make cards with them.  I pulled out a package of our Vanilla Note cards and envelopes; and scraps from my Gilded Autumn DSP and here is what I came up with - 

 
 The one above is my take on my November First Monday Challenge - you can see full details on what that is and how to enter - HERE!

How great are those - I now have a stack of cards ready to go out to friends and family for Thanksgiving - and I absolutely love them.  So I encourage you to look at different components you have started and are probably laying in a box in your craft room; and make them into something beautiful today!!!  Take care and I'll see you back here soon ! ~Maureen

Current Hostess Code for November 2020 -


Saturday, November 3, 2018

Everyday Cards Class - October

Sharing the two cards from my Everyday Cards class in October.  I try to rotate out different types of cards in this class - and also offer a variety of sentiments.  To see my upcoming classes click HERE.  This month I saw a similar card on Pinterest and just really loved the simplicity and beauty of it.  We used the Winter Woods set from page 27 of Stampin' Up's Holiday catalog - along with some simple reverse masking and sponging to get this beauty.
Here's a glimpse of the inside of the card.
Then for our other card we used the Wishing You Well set from page 35 of the same catalog.  This card reminds me of fall wheat fields - by using Marigold as my color base.  It could easily be green and add some red or yellow flowers for a summer bouquet, or flip it upside down and add purple flowers for a cluster of lavender drying.   But my favorite part is that wispy bow.
Here is it again on the inside of the card - I just love how it looks like organza and you can see through the layers.
Then for this card we colored several gems with our Alcohol Blend Markers and then added them to the cluster.  The basket weave embossing folder adds the finishing touch to this card.
Hope you like these cards - really perfect for this Fall Season.  Stop back soon for some more inspiration.   To order any products used in these cards you can go to my website - www.stampingwithmaureen.stampinup.net and hit SHOP - be sure to use the hostess code below for full benefits from me!  See you soon ~Maureen

Wednesday, September 21, 2016

Star of Light....

Okay - I'd be lying if I said I didn't have a ton of stuff from the Stampin' Up! Holiday Catalog - and I cannot tell a lie :)   But, I have found a new favorite.  It is the amazing "Star of Light" set and Starlight Thinlit Dies.  I have check other blogs, Facebook and Pinterest - and it just seems like you can't make a bad card with this set.  It is amazingly beautiful!
So yesterday we made the above card in my Christmas card class.   Nothing difficult here - just pure elegance.  The music notes come from the "This Christmas" Specialty DSP in the regular catalog.  This paper is thinner and perfect for layering; and full of wonderful 2 sided designs!  We tore and sponged that layer just a little to help it POP against the Vanilla background and cover any red or green that may have shown through from the other side after tearing.  
The stars were cut out of black and gold using the Thinlit Dies - and just look at this negative space. I have to make something beautiful out of the also :)   The gold stars adhered with glue dots and the black star is popped up on dimensionals.  Here you can see it close up - and we added the little gem in the middle to cover the glue dot, and to give a little extra bling!
And here is how we finished off the inside.  So pretty!  I love the sentiments that come with this set.  The ones I used here are just beautiful for the season.  But there is also a series of more religious ones too, in the set - such as "Guide us to Thy perfect light" and "The Light of Heaven"..."Became the Light of the World" - and I love these. 
Hope you enjoyed - only 14 weeks till Christmas!   ~Maureen
Click on any image below to go directly to my online store - 

Sunday, August 21, 2016

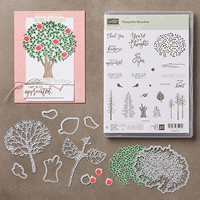
Thoughtful Branches Bundle - available in August or while supplies last...

So yesterday I shared a beautiful foil Christmas card made with the "Thoughtful Branches" Bundle and today I want to share a few more ideas for this bundle.  It is soooo versatile, and I've been having so much fun creating with it.  
For a limited time, you can get the exclusive Thoughtful Branches bundle. You will be able to order the stamp, framelits or bundle between August 2 and 31 (while supplies last).
To order go to my online store at www.stampingwithmaureen.stampinup.net and enter the codes as follows -
Item #Product NameRetail
144328Thoughtful Branches Bundle (ENG)$52.00 USD


143539Thoughtful Branches Photopolymer Stamp Set (ENG)$27.00 USD


143538Beautiful Branches Thinlits Dies$31.00 USD
So here are the cards I made for my recent class on this bundle - can you see the variety here?  The pines, the lilacs the tree..... 
This first Tree card is simple, and sweet, and you don't even need the framelits.  The trees give it that masculine, woodsy look - it would be perfect for a guys birthday care - but also a sympathy card.  The gems were colored with a green sharpie, before being added to the card, and I always love to add our linen thread to nature cards.
Next is my Lilac card - I LOVE lilacs - we have one really established white bush here, and since moving have planted 3 more of the purple variety.  Hoping to get a few flowers next summer off of those.  This flower below is actually made with dotted image that can also be used the tall trees.  I just switched up the colors and made flowers.  The layers and the bling just bring it all together.
 
But the final Christmas Thank You card is my favorite.  I've seen a lot of similar ones on blogs and Pinterest.  To me the white on white with the pop of Cherry Cobbler is just so elegant.  And the dots of snow behind the tree just make it!  This glass was all about the bling and included a package of gems in their registration, so you can see how we used them on each card.
 
This bundle is wildly popular - and I really hope SU! brings it back in next year's catalog.  But for now it is ONLY available while supplies last - so if you LOVE it - get it NOW!!  Not done yet though - stop by in a couple days and I'll be sharing one more fall card made with this same bundle.  ~Maureen
Click on any image below to go directly to my online store -