Tuesday, October 31, 2017

Stampin' Blends 3 month CLUB option

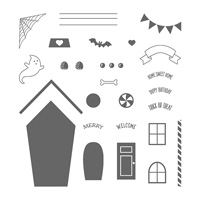
It's November 1 and Stampin' BLENDS are available.  These are AMAZING - and if you like to color - they are a must have.  Actually - if you do not like to color - these might just change your mind.  They are alcohol markers that color and blend so smoothly - you will not believe it!  Each has two tips - a nib tip and a brush tip - to help you get in all those little spots.  But - to get the entire set at once - it's $121.50 plus SandH and Tax.  So lets make this a little less painful - I'm breaking the purchase up into 3 month chunks for you - each of the months you will get 9 of the 27 blends available, at $40.50 a month plus SandH and Tax.  At the end of the three months you will have all 27 blends, plus I will throw in a package of our Thick Whisper White cardstock with your first month's order - FREE as long as you commit to all 3 months.  The thick cardstock is what is recommended for use with these markers, as alcohol markers will bleed through cardstock when used correctly.*
Month 1 you will get Old Olive 2pk, Cherry Cobbler 2pk, Crumb Cake 2pk, and Pumpkin Pie 2pk - plus the Color Lifter and your FREE package of Thick Whisper White cardstock for your 3 month commitment (a $7.00 value). 
Month 2 you will get Calypso Coral 2pk, Pink Pirouette 2pk, Pool Party 2pk, and Daffodil Delight 2pk - plus the Ivory Blends marker.
Month 3 you will get Bermuda Bay 2pk, Night of Navy 2pk, Rich Razzleberry 2pk, and Smokey Slate 2pk - plus the Bronze Blends marker.  Completing your kit. 

You can sign up anytime in November or December to join this club.  You must order directly through me, by emailing me at crazystampinglady@gmail.com.  Please let me know you are committing to the three months and include your full name, mailing address and contact phone number.  I will then call you for your credit card information if I do not have it on file with Stampin' Up! already.  Once ordered -  you will receive your first set within 10 business days, and the 2nd set 1 month later, and the 3rd set 1 month after that.  You will be billed each month as that set of markers is ordered.  *additionally it is recommended to use Memento ink with alcohol markers - so if you need that, please let me know.  It will be an additional $6.00 plus SandH and tax.

You can see full information on these markers at www.stampinup.com.  Sign-up NOW and let's get coloring!!! ~Maureen

Happy Halloween!!

So much fun - my Technique CLUB 1 made this adorable project as their renewal thank you for our next round of club.  It was tons of fun to design, and I think they turned out super cute!  I purchased the black frames at a local craft store, and removed the glass so we could pop up some images. 
After checking Pinterest for tons of Halloween sampler ideas - I came up with the panels above and below.  The orange hat, the front gravestone, the small pumpkin and one of the bats are all popped up to give it that great dimension.
Here it is from the side - where  you can see (maybe) some of those images popped up. 
I love holiday samplers - they are such a cute and fun addition to your decorating.  Have a Happy Halloween - and be careful out there!!~Maureen
Click on any image below to go directly to my online store - 

Friday, October 27, 2017

Stampin' Blends are COMING - November 1

Stampin' Up! is introducing their new line of Alcohol Blending Markers - Stampin' Blends - in 12 exclusive Stampin' Up! colors and they'll be available for you to order November 1st!!  So watch for full details coming soon!  In the meantime check out their beauty.  We demonstrators were able to pre-order and play - and that is what I've been doing!

I've been using the images from the "Just Add Color" designer series paper in our annual catalog - and just look how beautiful these colors come out!  You can also stamp and color - but be sure to use Memento ink - as our Basic Black does not work with alcohol inks.  And a tip - either heat dry the Memento - or let sit several minutes before coloring to be sure it is perfectly dry.  Then it works great!

Besides their beauty - they coordinate perfectly with our current colors - so each card you make looks so nicely finished!

After I finished the entire 12"x12" sheet - I just cut it apart and added to layers on my cards - popped on a sentiment and a bow - and DONE!

What a fun, relaxing, creative way to color - be sure to get your hands on them as soon as you can!  ~Maureen

Merry Patterns - what a fun set!

So for the month of October ONLY Stampin' Up! is offering this beautiful incentive set for orders/parties over $300.
I FELL IN LOVE with it as soon as I saw it.  So I've been playing and making some beautiful cards.  I found one similar to the card below on Pinterest - but it was done in blues.  I switched it up a bit, with vanilla, espresso and cajun and this is what I came up with.  The buck with the sweater - is fussy cut, and then popped up on dimensionals.
The foil doily below kind of gives him a special pedestal to stand on.
To me it's such a woodsy, natural feeling card - perfect for the holidays - and masculine enough for any guy you need to send a card to.  Anyway, I hope you liked it too -would love to hear your thoughts. ~Maureen
click on any image below to go directly to my online store - 

Wednesday, October 25, 2017

Halloween Test Tube TREATS!

Hi All - can you believe it - Halloween is almost here!!!  Today I am going to share some adorable Test Tube treat holders based on the tutorial from the talented Erica Cerwin.  She shared this on her facebook page - and I had to try it out.  So below you see the finished products ready to hand out to my eight amazing grandkiddos!
Below is a "blurry" close up of the actual test tube filled with dark chocolate candy dots from out local Sprouts store.  These dots are about the same size as MandM's - so I'm sure those would work also, or any other tiny candy or item (maybe a rolled up $10 bill).  These test tubes are currently available through my SU! store and there is a link at the bottom of this post.
So here is the actual pattern for the holder.  The top layer is 6"x2" - scored as in the picture below at 1", 1 1/2", 4 1/2" and 5".  Then two circles are punched as shown in the diagram using the 3/4" punch.  For my holders I used the Foil Frenzy DSP because it is a bit heavier cardstock so holds up better for this project - plus it comes in a bunch of sparkling colors - several of which are perfect for Halloween.
You will need to fold as shown - each end fold, folds up to the front, and then each second fold, folds back away to give you the image below.  You'll also need a 4 3/4" x 2" piece of coordinating cardstock for the backing.  Place a piece of our tear tape on each end - and then attach the two pieces of cardstock together matching the ends.
Below I show before punching and attaching and behind it the one punched, attached, and the test tube fed through.
You could actually make these without the backing, as shown below - but the backing piece gives it a lot more stability.
Finally - after you have filled your test tube, and put your project together - finish it off in any way you desire.  Note that I used dimensionals to attach my design to the front, as the holder is curved, and dimensionals held better than snail adhesive.  For my design, I used several of our punches, as well as the bat, ghost and "Trick or Treat" from our Sweet Home stamp set.  
Ghosts for the boys -
Bats for the girls -
Hope you enjoyed this post and tutorial.  Don't be limited by Halloween though - these would make adorable place settings at Thanksgiving filled with sunflower seeds, and decorated with a sunflower on top - or how about Christmas stocking stuffers filled with cocoa mix.  The possibilities are endless.  Be sure to get the test tubes now though while still available.  Would love to hear what you think - so be sure to leave me a comment.  See you all soon - Maureen
Click on any image below to go directly to my online store -