Showing posts with label free. Show all posts

Sunday, December 15, 2024

Share it Sunday! Free tutorial - Artful Amaryllis


It's Sunday - and time to share another great card and free tutorial!  Isn't this beautiful!! Using a much overlooked bundle from the current mini catalog - and it's all on sale now on the Last Chance List!  I hope you like it as much as I do!

~*~*~*~*~*~

Click HERE to find and print your tutorial sheet.

Artful Amaryllis

All images © 1990-2024 Stampin’ Up! ®


Supplies:

·       Stamps: Artful Amaryllis (164242)

•       Card Stock: Basic White (159276); Cherry Cobbler (119685); Old Olive (100702): Basic Black (121045)

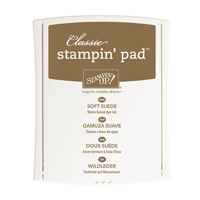
•       Stamp Pads: Versa Mark (102283); Cherry Cobbler (147083)

•       Tools: Artful Amaryllis Dies (164081); Forever Plaid 3D Embossing Folder (164049); Nested Essential Dies (161597)

•       Miscellaneous: Paper Trimmer (152392); Paper Snips Scissors (103579); Stampin’ Seal (152813); Stampin Seal + (149699); Stampin’ Cut & Emboss Machine (149653); (161672); Basics WOW Embossing Powder (165679); Heat Tool (129053); Iridescent Foil Gems (162842); Daffodil Delight Stampin Blends Combo Pack (154883); Stampin Dimensionals (104430); Mini Glue Dots (103683)


Measurements:

•       Cherry Cobbler: 5 ½ x 8 ½”


Instructions:

1.    Cut a piece of Cherry Cobbler card stock 5 ½” x 8 ½” and score at 4 ¼”.

2.    Cut a piece of Cherry Cobbler 4” x 5 ¼” and emboss with the Forever Plaid 3D Embossing Folder and then adhere to card base.

3.    Cut a piece of Basic Black Card Stock 2 ¾” x 5 ¼” and adhere to embossed piece on card base with Stampin Dimensionals.

4.    Cut a piece of Basic White card stock 2 5/8” x 5 1/8” and using the die emboss flowerets on the Basic White piece as shown or as you wish randomly. Then adhere to Basic Black piece.

5.    Die cut Amaryllis flowers out of Cherry Cobbler then using the dauber daub some Cherry Cobbler ink on the petals.

6.    Die cut flower centers out of Basic White card stock and put a dot of yellow in the center with Daffodil Delight Stampin Blend marker the die cut stems out of Old Olive Card Stock.

7.    Put the flowers together and adhere as shown using glue dots and Stampin Dimensionals.

8.    Emboss the sentiment in white on Basic Black card stock. Die cut out with the Nested Essentials die and then adhere with dimensionals.

9.    Add embellishments.

10.  Enjoy!


~*~*~*~*~

You can check in the SHOP NOW tab at the top of this page to find my current hostess code at any time.

To order any of Stampin' Up's products you can go directly to my online store - www.stampingwithmaureen.stampinup.net  and click on SHOP NOW.  Please use the Hostess Code 63CFQSF2 through December 31, 2024 to get full benefits from me-

*NOTE: If your personal order is not part of a current party and you are ordering over $150 in merchandise - please do not use this code; as your order without the code will qualify you to earn a minimum of 10% in hostess benefits.  
 ~*~*~*~*~

 Any costs shown are in the U.S. Market for December 2024 – Price will vary in other Stampin’ Up! markets.

   ~*~*~*~*~

If you don't currently have a demonstrator and would like a catalog; or would like to learn more about Stampin' Up! and our products, please email me at crazystampinglady@gmail.com

*Note: Product pricing varies by market.  Check with your local demonstrator if you are not in the U.S. to find out your cost.
_________________________________________

Always Stamping, Maureen - the Crazy Stamping Lady!

Thursday, February 23, 2017

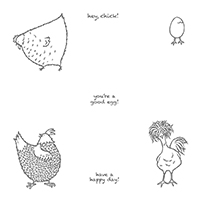
Hey Chick!

I am in love with this amazing "Hey Chick" set that you can get FREE during Sale-a-bration with any $50 purchase.   It is absolutely the cutest thing.  I'm not one for the corney - quirky sets - usually, but this one has won me over.  Here's the picture I posted on Facebook and Instagram a while back while I was sitting and coloring at Starbucks - and I wanted to show you what I did with those images I colored. 
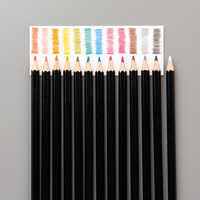
After coloring them with SU's new watercolor pencils, I cut them apart, and made these adorable cards for my TEAM achievers!
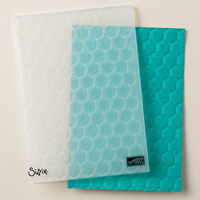
The background is make by inking up the Hexagons Dynamic Textured embossing folder with Soft Suede ink and then pressing it down on my card base - using it like I would a stamp.  It is perfect for making the impression of Chicken Wire!  I just tapped here and there - not worrying about whether or not the pressure was perfect.
Here you can see the card and I did the same thing with the embossing folder on the outside of the envelope!  I just love the look of these - with their funky little colorful birds.  Hope you like them too!
See you soon with some more cards made with this set.  Wanna get your own set FREE - just place an online order of $50 or more (pre S&H and tax) and add "Hey Chick" as your free choice.  You can order at www.stampingwithmaureen.stampinup.net - and PLEASE use HOSTESS code - 4A4WS9QD ~Maureen
To order - just click on any image below to go directly to my online store - 

Sunday, September 21, 2014

Curvy Pumpkin Box

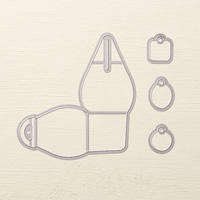
So one of my projects at the downline was this adorable little pumpkin treat box made with SU's new Curvy Box framelit.  This framelit is amazing - you can make these cute little boxes in no time, and it is so versatile.  I've seen it made into animals, purses, and of course at least one thing for each holiday.  If you do treats for school, table setting or just your sweeties this is a must have!
I took pictures from two different angles so you can get and idea of how it works.  You cut it out in two pieces that are already scored by the framelit, use your bone folder to crease - stamp - and then adhere your pieces together. 
Then you bring up the front and back that have the handles, and bring the side pieces up that have slot that fit over the handle.  It is stinkin' cute!!  

Not in my downline you say?!?  Wanna make your own little box you say?!?  Well you are in luck as this is one of the two free projects we'll be making Tuesday evening.  Full details below - sign up by Monday at 5PM.  Hope to have you join us! ~Maureen

~*~*~*~*~


Tuesday, September 23, 2014 ~ 7:00 – 9:00 PM
 Girl’s Night Out Event!! – Mystery Hostess Event
Maureen’s Home in Simi Valley*
Cost: This event is FREE to anyone who just wants a FUN night of stamping and learning about Stampin’ Up! workshops.  I’m working hard to earn the next incentive trip and to do that I need more in-your-home workshops – so I want to give you the opportunity to experience one before hosting your own.
Join us for the Fun as we enjoy light refreshments and beverages and I hold a workshop where you can learn all about our products and Hostess benefits.  There will be incentives for purchasing and booking – but no purchase or booking is required.  If purchases are made we will raffle off any hostess benefits to the attendees.  Mostly – really – it’s all about the FUN!!
All materials to make the projects will be provided.
Limit 10.  Must RSVP to hold your spot.
Products used in creating this little pumpkin box -