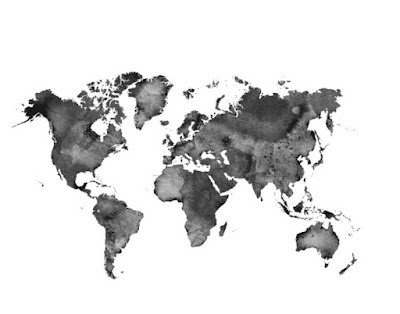
It's Sunday - and time to share another great card and free tutorial! Today I'm sharing a fun and simple card using the Watercolor World set that is continuing on into the next catalog. This was a must have stamp for me - and it's so easy to personalize where it is from to where it is to. Hope you like it! Enjoy!
Watercolor World
All
images © 1990-2023 Stampin’ Up!®
Supplies:
· Stamp Sets: Watercolor World (160708); Sending Smiles (158701)
·
Card Stock (CS) and Designer
Series Paper:
Basic White CS (159276); Old Olive CS (100702); Pear Pizzazz CS (131201)
·
Stamp Pads: Granny Apple Green Ink (147095);
Mossy Meadow Ink (147111); Tuxedo Black Memento Ink (132708)
·
Tools: Sponge
Daubers (133773);
Layering Circles Dies (151770)
·
Miscellaneous: Basic Black Stampin’ Write
Marker (100082); Neutrals Stampin’ Write Marker Assortment (147148); Blackberry
Bliss Stampin’ Blends Combo Pack (154877); Pearl Basic Jewels (144219);
Stampin’ Dimensionals (104430); Stampin’ Seal Adhesive (152813)
Measurements:
· Basic White CS: 8 1/2” x 5 1/2” scored at 4 ¼”; Strip 3/8” x 4 ½”; Layer 3 ¾” x 5”
·
Pear Pizzazz CS: 3 ¾” x 5”
·
Old Olive CS: 4” x 5 ¼”
Instructions:
1. Adhere Old Olive layer to the card base; then adhere the Pear Pizzazz layer to the Old Olive layer.
2. Ink up the Watercolor World
with Granny Apple Green, then using the dauber add some of the Mossy Meadow ink
randomly directly onto the stamp, and using the Mossy Meadow Stampin’ Write
marker brush end – add some accents around edges of image directly onto the
stamp. Huff on it to remoisten and stamp
onto the Basic White layer.
3. Fussy cut the entire image
leaving a border around and adhere to the Pear Pizzazz layer.
4. Using a circle die as an arc
– draw a dotted line from point A (where you live) to point B (where the
recipient lives) using the Basic Black Stampin’ Write marker. Color two small pearls with the Light
Blackberry Bliss Stampin’ Blend and add these two pearls to mark point A and
point B.
5. Stamp
sentiment from the Sending Smiles set using the Memento ink on the thin strip
of Basic White. Flag the right end – and pop up on the map using Stampin’
Dimensionals.
~*~*~*~*~


No comments:
Post a Comment