Sunday, February 26, 2023

Share it Sunday! Free tutorial - Easter Bunny treat holder!

 
It's Sunday - and time to share another great card and free tutorial! Today I'm sharing an oh so sweet treat holder with the Easter Bunny bundle - I shared another design with this same treat holder earlier this week HERE.  Starting to get in the Easter mood now that Lent is here - April 9 will be here before you know it.   Hope you like it!  Enjoy!

Unfortunately the punch is not available until May 15th - after Easter - but the set definitely can stand on it's own - and Mr. Bunny is not hard to fussy cut.


#160272 Easter Bunny $19.00*

~*~*~*~*~

Click HERE to find and print your tutorial sheet.

Easter Bunny March 2023

All images © 1990-2023 Stampin’ Up!®

Supplies:

·       Stamp Sets: Easter Bunny Bundle (160606)

·       Card Stock and Paper: Basic White (159276), Polished Pink (155710); Flowers & More (160802)

·       Stamp Pads: Memento Ink (132708)

·       Tools: Simply Scored (122334), Paper Trimmer (152392); Happy Labels Punch (160693); Take your pick (144107); Stampin’ Pierce Mat (126199)

·       Miscellaneous: Stampin’ Dimensionals (104430); Stampin’ Seal Adhesive (152813); Glue Dots (103683); Multipurpose Liquid Glue (110755); Polished Pink Open Weave Ribbon (155714); Round & Square Brads (155570); Polished Pink Blends (155520); Gray Granite Blends (154886); Loose flower flourishes (155808)

Measurements:

·       Polished Pink – 6 x 8 ½

·       Basic White –  5/8 x 1 ¾, scrap for bunny

·       Flowers & More DSP – (6) 1 7/8 x 1 7/8

Instructions:

1.    Score the polished pink on the 8 ½ inch side at 2, 4, 6, 8.

2.    Score on the 6-inch side at 2 and 4.

3.    Fold and burnish on all the score lines.

4.    Cut up to the first score line on both 8 ½ inch sides.

5.    Remove the ½ inch rectangle on the small fold. Do that on both sides leave the rectangle in the middle for adhesive.

6.    Adhere the DSP on the middle 4 squares. Also adhere to the front top and back top of the box.

7.    Adhere the tab to the back of the box. Fold up the bottom and adhere. Making sure the seams are at the back of the box.

8.    Fold in the 2 side of the top of the box, (they don’t have the DSP).

9.    Poke a hole in the very top of the front of the box, do the same on the back piece. (These do have the DSP). Put a square brad in the holes so the progs are in the back.

10. Tie a small bow and with a glue dot adhere to the brad.

11. Stamp the sentiment and punch the right end of the cardstock. Using a dimensional adhere under the ribbon.

12. Stamp the bunny and punch out with the bunny punch. Color as shown using the light of both colors.

13. Adhere small Loose Flower Flourish with a glue dot under bunny ear.

14. Adhere to the front bottom of the box with dimensionals. 

~*~*~*~*~
You can check in the SHOP NOW tab at the top of this page to find my current hostess code at any time.

To order any of Stampin' Up's products you can go directly to my online store - www.stampingwithmaureen.stampinup.net  and click on SHOP NOW.  Please use the Hostess Code SAQTJGWV through February 28, 2023 to get full benefits from me-


*NOTE: If your personal order is not part of a current party and you are ordering over $150 in merchandise - please do not use this code; as your order without the code will qualify you to earn a minimum of 10% in hostess benefits.   

~*~*~*~*~


Proceeds from every purchase of this bundle during the month of February 2023 go to support the
  Doors of Hope Ministry in Murfreesboro, TN 
Plus, you will receive a Bonus Tutorial PDF (sent within a week following your order) featuring great projects and ideas with this bundle. You must order using the hostess code above to get these benefits!

 ~*~*~*~*~

If you don't currently have a demonstrator, and would like a catalog or to learn more about Stampin' Up! and our products, please email me at crazystampinglady@gmail.com

*Note: Product pricing varies by market.  Check with your local demonstrator if you are not in the U.S. to find out your cost.  Product active to purchase at the time of this post.
_________________________________________

Always Stamping, Maureen - the Crazy Stamping Lady!

Friday, February 24, 2023

SF-2023 February Blog Hop - Fabulous Fun Fold & 3D Projects!


Be sure to hop through all the blogs on the list near the bottom for tons of wonderful inspiration as we create Fabulous Fun Fold & 3D projects to share with you!!
 ~*~*~*~*~  
Spring is really starting here in TN - and the Sunshine and Daffodils blooming everywhere makes me so happy.  So I decided to go with that theme for my projects this month - and yes, this month we are each doing a fun fold card plus a 3D project - so be sure to check it out!!
For my projects I am using the Rain or Shine Suite of products from page 50 & 51 of the SU! Jan. - Apr. 2023 Mini Catalog.  This is just such a fun suite and full of sunshine (and rain) and a lot of smiles!!
I love everything about this - and have been playing with it a lot - even more exciting it coordinates with our current Paper Pumpkin set.

#160556 Rain or Shine Suite  $85.25

My card is a book binding fun fold - such a perfect way to showcase these products - the stamp set, dies, DSP and Loose Daisy embellishments all come together to create this fun card.  I took a few more minutes to finish off the inside of the card too.  The card base is 4 1/4" x 11" scored at4 1/2" and 5 1/2" on the long side.  Add your ribbon to that one inch section and seal that section down to the back - then finish your card. 
Next I wanted to create a fun little treat/gift holder to go with it - so I made this adorable little 2-4-6-8 box that just shouts happiness!  Just think of the fun stuff you could fill this with. Check out my upcoming post on Sunday as I'll be sharing another of these little boxes along with instructions on my Share it Sunday post! 
Wouldn't this just be a great little duo to give for a birthday, Easter - or just I love you.

 ~*~*~*~*~

Thank you for stopping by my blog.   Maybe you got some inspiration for creating something wonderful of your own.  I would love it if you would leave me a comment below and stop back soon.  Don't forget to click through on each name below to see even more awesome ideas. 

~*~*~*~*~
You can check in the SHOP NOW tab at the top of this page to find my current hostess code at any time.

To order any of Stampin' Up's products you can go directly to my online store - www.stampingwithmaureen.stampinup.net  and click on SHOP NOW.  Please use the Hostess Code SAQTJGWV through February 28, 2023 to get full benefits from me-

*NOTE: If your personal order is not part of a current party and you are ordering over $150 in merchandise - please do not use this code; as your order without the code will qualify you to earn a minimum of 10% in hostess benefits.   

~*~*~*~*~


Proceeds from every purchase of this bundle during the month of November 2022 go to support the
  Doors of Hope Ministry in Murfreesboro, TN 
Plus, you will receive a Bonus Tutorial PDF (sent within a week following your order) featuring great projects and ideas with this bundle. You must order using the hostess code above to get these benefits!

 ~*~*~*~*~

Clearance rack was updated on 2/21/23 - with a ton of products and even stamp sets.

*~*~*~*~*

If you don't currently have a demonstrator, and would like a catalog or to learn more about Stampin' Up! and our products, please email me at 
crazystampinglady@gmail.com


*Note: Product pricing varies by market.  Check with your local demonstrator if you are not in the U.S. to find out your cost.  Product active to purchase at the time of this post.
_________________________________________

Always Stamping, Maureen - the Crazy Stamping Lady!

Tuesday, February 21, 2023

Simple Sketch #2 Challenge - February 2023

Join me for some new FUN! Each month this year I will be doing a new sketch challenge around the last week of the month.

A Monthly Sketch Challenge!
Here is the sketch!
MEASUREMENTS:

Base A2 – 5 ½” x 8 ½” scored at 4 ¼”

Layer 1 – 4” x 5 ¼”

Layer 2 – 2” x 5 ¼”

Layer 3 – 3 ¼” x 3 ¼”

Layer 4 – 3” x 3 “

Post the card(s) you make in the comments of my Facebook Business page post HERE, Scroll down till you find the February Sketch challenge post, so they can be entered in my drawing on 3/1/2023. All card pictures must be posted by midnight 2/28/2023. Each unique card pic is an entry - and I will give away a fun embellishment. Have fun with this - can't wait to see what you make!

Here are some samples I made with this sketch on my Facebook Lives.  
Vertical Layout!
Horizontal Layout!
You can see my videos on Facebook with all the details here - 
www.facebook.com/CrazyStampingLady/videos/2015325705339234
I hope you play along - have fun with it - take some creative license - just use the sketch as your inspiration!!
~*~*~*~*~
You can always click on the SHOP NOW tab at the top of this page to find my current hostess code at any time.

To order any of Stampin' Up's products you can go directly to my online store - www.stampingwithmaureen.stampinup.net  and click on SHOP NOW.  Please use the Hostess Code SAQTJGWV through February 28, 2023 to get full benefits from me-

*NOTE: If your personal order is not part of a current party and you are ordering over $150 in merchandise - please do not use this code; as your order without the code will qualify you to earn a minimum of 10% in hostess benefits.   

~*~*~*~*~


Proceeds from every purchase of this bundle during the month of November 2022 go to support the
  Doors of Hope Ministry in Murfreesboro, TN 
Plus, you will receive a Bonus Tutorial PDF (sent within a week following your order) featuring great projects and ideas with this bundle. You must order using the hostess code above to get these benefits!

 ~*~*~*~*~

If you don't currently have a demonstrator, and would like a catalog or to learn more about Stampin' Up! and our products, please email me at crazystampinglady@gmail.com

*Note: Product pricing varies by market.  Check with your local demonstrator if you are not in the U.S. to find out your cost.  Product active to purchase at the time of this post.
_________________________________________

Always Stamping, Maureen - the Crazy Stamping Lady!

Sunday, February 19, 2023

Share it Sunday! Free tutorial - Friendly Gnomes!

 
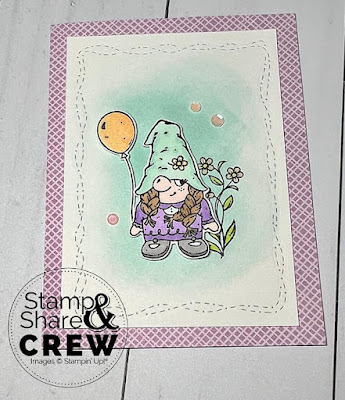
It's Sunday - and time to share another great card and free tutorial! Today I'm sharing this adorable Gnome card - I put off getting this set till recently, and now I love it.  Planning to try some fun St. Paddy's Day cards with it this weekend.   Hope you like it!  Enjoy!

#160714 Friendly Gnomes $24.00*

~*~*~*~*~

Click HERE to find and print your tutorial sheet.

Friendly Gnomes

All images © 1990-2023 Stampin’ Up!®

Supplies:

·       Stamp Sets: Friendly Gnomes Stamp Set (160714)

·       Card Stock and Paper: Fresh Freesia (155613); Basic White (159276); Butterfly Kisses 6” x 6” Designer Series Paper (DSP) (159112)

·       Stamp Pads: Tuxedo Black Memento Ink (132708); Highland Heather Classic Ink (147103); Pool Party Classic Ink (147107)

·       Tools: Gnome Dies (159625); Stitched with Whimsy Dies (155314); Highland Heather Stampin’ Blends (154887); Pool Party Stampin’ Blends (154894); Pale Papaya Stampin’ Blends (155519); Smoky Slate Stampin’ Blends (154904); Granny Apple Green Stampin’ Blends (154885); Small Blending Brushes (160518)

·       Miscellaneous: Pastel Adhesive-Backed Sequins (160387); (Stampin’ Dimensionals (104430); Stampin’ Seal Adhesive (152813); Wink of Stella Glitter Brush (141897)

Measurements:

·       Fresh Freesia CS: 8 1/2" x 5 1/2” and score at 4 1/4” on the long side

·       Basic White CS: (2) 3 1/2” x 4 7/8”; die cut with 2nd to largest Stitched with Whimsy Die

·       Basic White CS: Scrap for stamping balloon and gnome – cut out

·       Fresh Freesia DSP: 4 1/4" x 5 1/2”

Instructions:

 1.    Adhere Fresh Freesia DSP to card front

2.    Stamp Gnome and Balloon; color with Stampin’ Blends and die cut or fussy cut

3.    Die cut (1) Basic White CS with Stitched with Whimsy die

4.    Blend Pool Party Classic Ink onto Basic White layer to create halo image, keeping the ink lighter in the area that you will stamp your flower directly onto this CS

5.    Stamp flower image and color in with Stampin’ Blends

6.    Adhere layer to card front

7.    Adhere gnome and balloon images using Stampin’ Dimensionals

8.    Add Wink of Stella Glitter Brush to balloon

9.    Add Pastel Adhesive-Backed Sequins to card front

10. Stamp sentiment in Highland Heather Classic Ink onto second Basic White CS piece and adhere to inside of card.

~*~*~*~*~
You can check in the SHOP NOW tab at the top of this page to find my current hostess code at any time.

To order any of Stampin' Up's products you can go directly to my online store - www.stampingwithmaureen.stampinup.net  and click on SHOP NOW.  Please use the Hostess Code SAQTJGWV through February 28, 2023 to get full benefits from me-

*NOTE: If your personal order is not part of a current party and you are ordering over $150 in merchandise - please do not use this code; as your order without the code will qualify you to earn a minimum of 10% in hostess benefits.   

~*~*~*~*~


Proceeds from every purchase of this bundle during the month of November 2022 go to support the
  Doors of Hope Ministry in Murfreesboro, TN 
Plus, you will receive a Bonus Tutorial PDF (sent within a week following your order) featuring great projects and ideas with this bundle. You must order using the hostess code above to get these benefits!

 ~*~*~*~*~

If you don't currently have a demonstrator, and would like a catalog or to learn more about Stampin' Up! and our products, please email me at crazystampinglady@gmail.com

*Note: Product pricing varies by market.  Check with your local demonstrator if you are not in the U.S. to find out your cost.  Product active to purchase at the time of this post.
_________________________________________

Always Stamping, Maureen - the Crazy Stamping Lady!