It's time to share another great tutorial - this one is bright and cheery - as we all long for Springtime. With a pop of pink because after all this is Valentine's Month - enjoy!
~*~*~*~*~
Click HERE to find and print your tutorial sheet.
Sentimental Swirls
All images © 1990-2022
Stampin’ Up!®
Supplies:
- Stamp
Sets: Sentimental Swirls (157996)
- Card
Stock and Paper: Thick Basic White (159229); Bumble
Bee (153007)
- Stamp
Pads: Pear Pizzazz (147104);
Polished Pink (155712)
- Tools:
Stitched So Sweetly Dies
(151690); Hive Embossing Folder (157955); Stampin’ Cut & Emboss Machine
(149653); Strawberry Builder Punch (154239)
- Miscellaneous: Stampin’ Dimensionals (104430); Stampin’ Seal Adhesive
(152813); Mini Glue Dots (103683); Bumblebee ¼” Gingham Ribbon (153658); Iridescent
Rhinestone Basic Jewels (158130)
Measurements:
Basic White: 8 ½ X 5 ½ scored at 4 ¼ and burnished with the Bone Folder, remainder of sheet for stamping and diecutting
- Bumblebee: 4” x 5 ¼”
Instructions:
1. Emboss Bumblebee cardstock using the Hive Embossing folder and adhere to the Thick Basic White cardstock with Stampin’ Seal Adhesive.
2.
Cut
second largest scalloped rectangle using the Stitched So Sweetly Dies and stamp
the swirls using the Sentimental Swirls stamp set and Pear Pizzazz Ink. Attach
to card base using Stampin’ Dimensionals.
3.
Stamp
and punch flowers onto Thick Basic White cardstock with Polished Pink ink.
Punch flower out using the Strawberry Builder Punch and attach to card with
Stampin’ Dimensionals.
4.
Add
one Iridescent Rhinestone Basic Jewel to the center of each flower.
5.
Stamp
sentiment onto a ¾” x 1 ¾” piece of Thick Basic White cardstock using Polished
Pink ink and attach it to the scalloped rectangle with Stampin’ Dimensionals.
6.
Tie a
knot at the right end of the sentiment using Bumblebee ¼” Gingham Ribbon,
holding it in place with a Mini Glue Dot.
~*~*~*~*~
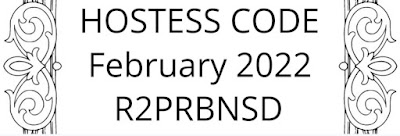
To order any of Stampin' Up's products you can go directly to my online store - www.stampingwithmaureen.stampinup.net and click on SHOP NOW. Please use the Hostess Code R2PRBNSD through Feb. 28, 2022 to get full benefits from me -
~*~*~*~*~
~*~*~*~*~


No comments:
Post a Comment