 |
| Sign up at - https://mypaperpumpkin.com/en/?demoid=6426 |
Another tip - the kit gives you DSP for a full liner on your envelope - but actually, when you open an envelope you only see the top portion of the designer paper, so I cut off part of each liner and have those pieces to use on other future projects.
 |
| cut off end of DSP piece |
 |
| adhere the top portion, and save cut off portion for another project |
 |
| still looks great when you open the envelope - and saves on bulk and weight of project |
Here is a close up of one of my designs - I did use a small flower punch (not included in the kit) to punch the flower from the excess liner DSP for the center of the big flower. But you could easily make this card without that addition.
Finally - here is everything I still had left over after completing all my cards - oh, and not in the picture - the ink spot and the four crystal buttons I decided not to use on the cards as I felt they were too bulky for mailing - so will use on a future project. How great is that!!!
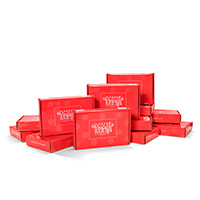
I hope these pictures inspired you to take advantage of this great Paper Pumpkin kit offer, and try it for yourself. Kits can be cards or other 3D items, and are different each month - so it's always a surprise. We did get a SNEAK PEEK at convention and I can tell you the next two kits are amazing. You must sign up by August 10 to get this month's kit - any sign-ups after the 10th will get the Sept. kit as their first one; and this special ends Sept. 10. So go here - PAPERPUMPKINSITE - now and sign-up! Then sit back and wait for the FUN to begin!! ~Maureen
***Check this post out if you'd like to see how fun and easy the kits are to make with your kids or grandkids. It's a great bonding and creative activity! http://www.crazystampinglady.blogspot.com/2015/05/paper-pumpkin-with-grandkids.html -



No comments:
Post a Comment