Pages

Sunday, April 23, 2023

Share it Sunday! Free tutorial - Tropical Leaf Bundle - Online Exclusive!

It's Sunday - and time to share another great card and free tutorial! Today I'm sharing an amazing card using the Tropical Leaf Bundle from our Online Exclusives. I just love the non-leafy blues and how they come together to shine on this card.  Hope you like it!  Enjoy!
#161249 Tropical Leaf Bundle $37.75

~*~*~*~*~
Click HERE to find and print your tutorial sheet.

Tropical Leaf Bundle

All images © 1990-2023 Stampin’ Up!®


Supplies:


  • Stamp Sets: Tropical Leaf Bundle (161242); Stamps and Punch

  • Card Stock and Paper: Basic White (159231); 

  • Stamp Pads: Coastal Cabana (147097); Pool Party (147107), Mint Macaroon (147106), Pacific Point (147098) (use any combination of current colors that you like!)

  • Tools: Something Fancy Dies (160424); Bone Folder (102300); Cane Weave 3D Embossing Folder (160580)

  • Miscellaneous: Stampin’ Dimensionals (104430); Mini Stampin’ Dimensionals (144108); Balmy Blue & White Variegated Ribbon (160448); Adhesive Backed Milky Dots (160582); Multipurpose Liquid Glue (110755)


Measurements:


  • Basic White: 8 ½ X 6 scored at 3 and burnished with the Bone Folder

  • 1 Sheet Basic White for Leaf images and sentiment label 

  • 8 inches of ribbon


Instructions:


  1. Emboss one half of the card with the Cane Weave 3D Embossing folder 

  2. Stamp a dozen leaf sentiments in the shades of your choosing.  Using the same color used for the leaf, stamp the leaf vein.  

  3. Use the Tropical Leaf Punch to cut the leaves.

  4. Stamp the “thanks so much” sentiment from the Tropical Leaf Bundle using the darkest shade (here Pacific Point).  Use the Something Fancy frame die to die cut the stamped sentiment.  Die cut three additional blank sentiment frames to add dimension to the sentiment.

  5. Use a blender brush to lightly add a wash of color (here Pool Party) around the sentiment die cut for added dimension.  

  6. Adhere the tropical leaves to the middle of the panel as shown with Stampin’ Dimensionals.  Trim the top and bottom leaves as shown.

  7. Place two strips of Balmy Blue and White Variegated Ribbon under the sentiment stack.

  8. Adhere the layers of sentiment stack using Multipurpose Liquid Glue.

  9. Adhere Milky Dots to the sentiment stack as shown.

  10. Adhere sentiment stack over ribbon with Stampin’ Dimensionals.


~*~*~*~*~

You can check in the SHOP NOW tab at the top of this page to find my current hostess code at any time.

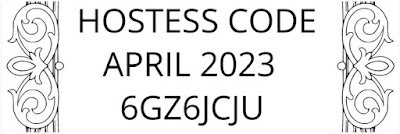
To order any of Stampin' Up's products you can go directly to my online store - www.stampingwithmaureen.stampinup.net  and click on SHOP NOW.  Please use the Hostess Code 6GZ6JCJU through April 30, 2023 to get full benefits from me-
*NOTE: If your personal order is not part of a current party and you are ordering over $150 in merchandise - please do not use this code; as your order without the code will qualify you to earn a minimum of 10% in hostess benefits.   

~*~*~*~*~

 
Proceeds from every purchase of this bundle during the month of March 2023 go to support the
  Doors of Hope Ministry in Murfreesboro, TN 
Plus, you will receive a Bonus Tutorial PDF (sent within a week following your order) featuring great projects and ideas with this bundle. You must order using the hostess code above to get these benefits!

~*~*~*~*~

If you don't currently have a demonstrator, and would like a catalog or to learn more about Stampin' Up! and our products, please email me at crazystampinglady@gmail.com

*Note: Product pricing varies by market.  Check with your local demonstrator if you are not in the U.S. to find out your cost.  Product active to purchase at the time of this post.
_________________________________________

Always Stamping, Maureen - the Crazy Stamping Lady!

No comments:

Post a Comment